




Bill Volz's Westchester

Blog / Service Tips

Blog

All Service Tips Local Jeep Lineup Dodge Ram Trucks Jeep Tips Jeep Wrangler Chrysler Advice Driving Tips Dodge Charger Jeep Compass Chrysler Tips Jeep Owner Tips Electric Vehicles Financing Local Shops Local Cafes Used Vehicles Vehicle Upkeep Wagoneer Challenger Tips Chrysler Features Chrysler Service Tips Cortlandt Manor Used Cars Mopar
CDJR Vehicle

How to Prepare Your CDJR Vehicle for Winter: Maintenance and Care Tips

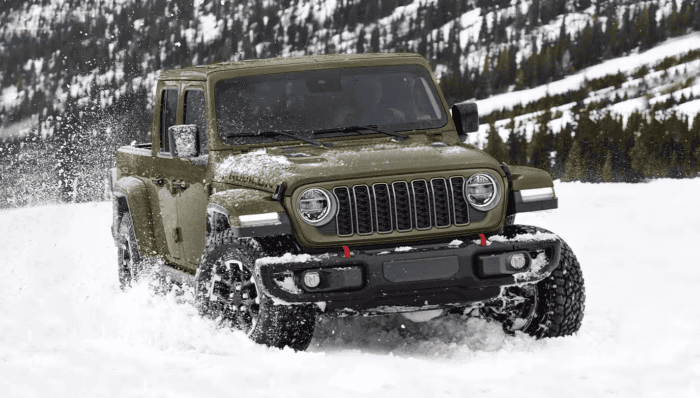
New York’s harsh winter conditions can turn your trusty Chrysler Dodge Jeep Ram (CDJR) vehicle into a problem if you don’t prepare it correctly. As the mercury drops around Cortlandt, your vehicle faces challenges. Ensuring your ride is winter-ready protects both your wallet and family when road conditions worsen during the harsh driving months ahead. Our team at Bill Volz Westchester CDJR has compiled this comprehensive guide to winter vehicle preparation in the mid-Hudson Valley. more How To Prepare Your CDJR Vehicle for Winter: Maintenance and Care Tips The statistics are eye-opening. According to the Department of Transportation, weather causes approximately 12% (744,911) of all vehicle crashes yearly. Winter-related road accidents account for an average of 11% (268,239) of injuries and 9% (3,807) of fatalities. Cold temperatures affect everything because chemical reactions slow down, causing your battery to struggle; engine oil thickens and fights against your starter motor, while tire pressure drops with every temperature dip, decreasing grip on slick roads. Because these issues can occur overnight, taking action before the first snowfall saves you problems. Battery Performance and Cold Weather Readiness At 0 degrees F, your battery has only half the cranking power it has at 80 degrees F. Cold temperatures make your engine oil thick, forcing the starter to work harder while drawing power from a temperature-weakened battery. Most batteries last three to five years, but winter quickly exposes any weaknesses. Slow cranking, dim headlights, and dashboard warning lights need to be addressed urgently because cold weather will quickly push your battery over the edge. Get your battery checked before winter to ensure it works when you need it. Tire Safety and Winter Traction When winterizing, truck and car tires should be at the top of your list. For every 10-degree F temperature drop, tire pressure decreases by up to 2 psi. Underinflated tires increase the risk of hydroplaning and can make stopping distances 15% longer. Minimal tread on soft tires causes more road contact and allows water to build up between the tire and road, causing traction loss. Winter tires have proven to be better than all-season tires on ice and snow, and vehicles with both all-wheel drive (AWD)and winter tires stop faster than vehicles with AWD alone. Engine Fluids and Cooling System Winterization Engine oil thickens in cold weather, reducing engine protection and putting stress on it during startup. Multi-viscosity oils such as 0W-20 or 5W-30 are the best for reliable winter starts. The W indicates winter, and the numbers indicate the rates at which the oil flows in cold temperatures — the lower the number, the better the cold performance. Your cooling system prevents freeze damage while maintaining proper temperatures during operation. A 50/50 mixture of antifreeze and water protects down to minus 34 degrees F, but if you’re in a colder area, you’ll need to adjust the ratio to 60/40 or 70/30. Your cooling system also prevents overheating by managing heat transfer, so year-round maintenance is crucial. Critical Safety Systems for Winter Driving Winter puts stress on safety systems, with most accidents happening on wet, icy roads. Brakes are vital — jamming them leads to more crashes in winter. Properly working brakes can mean the difference between a close call and disaster. Poor visibility causes many winter accidents. Short winter days make your headlights work overtime, while snow and road gunk cut visibility even during daylight. Dirty headlight lenses can cut light output by 40%, so regular wipe-downs can prevent compromised lighting. Wiper blades are generally replaced every year, but they wear out quickly in harsh winter conditions, which requires them to be changed more frequently. Remember to refill your washer fluid with a winter-grade solution that stays liquid and cuts through road salt film. Protecting Your CDJR Vehicle from Winter Damage In winter, salt and water cause excessive damage to your vehicle — consider applying a protective coating before the cold weather hits. Winter damage can be expensive, with surface rust repair running at $50-$200, scale rust at $200-$1,000, and structural repairs in excess of $4,000. Rust buildup can knock 10% to 40% off your car’s resale value. Cold temperatures make rubber parts such as drive belts, hoses, and wiper blades brittle, causing them to fail unexpectedly. Salt penetrates coatings and components, causing corrosion, particularly in the undercarriage. Washing and rinsing your vehicle frequently will remove salt before it has time to damage anything. Wet boots and winter clothing bring moisture and salt into your car that damage upholstery and electronics. All-weather floor mats trap gunk while protecting your carpeting. Whenever possible, park in a garage to avoid exposure to extreme weather. Emergency Preparedness and Winter Driving Kit Even well-maintained vehicles can cause trouble, and an emergency kit is cheap insurance. You’ll need basics such as blankets for warmth, a flashlight for when it gets dark, and jumper cables for battery issues. A small shovel will help you dig out of snow, cat litter or sand improves traction, and an ice scraper clears windows. First aid supplies, flares, and a phone charger are also crucial. Be prepared in case you’re stuck for hours — pack water, at least a gallon per person for 24 hours, and snacks such as energy bars or trail mix. Add a rain poncho and extra clothing in case it rains. CDJR-Specific Winter Accessories Your CDJR vehicle comes with built-in winter-fighting features. AWD systems, high ground clearance, and smart traction control give you an edge on snow and ice that many other vehicles can’t match. The AWD system helps you tackle nasty situations with confidence, heated seats keep you warm, and remote start allows you to warm up your ride while finishing your coffee. Whether your vehicle is a Chrysler, Dodge, Jeep, or Ram, original CDJR accessories will fit your make and model perfectly. At our dealership in Cortlandt, we stock all-weather floor mats, bed liners, anti-slip running boards, and roof racks. Factory accessories, unlike generics, keep your warranty intact. Your Winter-Ready CDJR Partner in Westchester Maximizing your CDJR vehicle’s built-in winter features requires attention to detail. Prewinter preparation goes beyond basic maintenance, as it must address the specific winter needs of your vehicle. Our technicians at Bill Volz Westchester have years of CDJR experience and understand not just what needs fixing but also what winter preparation your vehicle needs. Don’t wait for the first storm to hit. Our team is ready to prepare your vehicle for whatever Mother Nature throws at Cortlandt this winter, so schedule your winter service today. Images from jeep.com
Front of a Pick Up Truck

How To Reset Ram Park Assist Sensors

Last Updated: August 2026 Ram's active park assist feature helps you navigate tight spots, hitch trailers, and avoid obstacles, making parking your truck a breeze. But what happens if you see a "Service ParkSense" or "ParkSense Unavailable Wipe Rear Sensors" error message? Our team at Bill Volz Westchester put together this comprehensive guide on how to troubleshoot and reset Ram park assist sensors, including safety precautions and winter maintenance tips to keep your system working smoothly. more Understanding Ram Park Assist Sensors New Ram Trucks Schedule Service Call Us Today The ParkSense system uses multiple ultrasonic proximity sensors located on your Ram's front and rear bumpers to detect nearby obstacles. These sensors emit high-frequency sound waves that bounce back when they hit an object. By measuring the return time, the system calculates the exact distance between your truck and the obstacle. Parking assist technology has advanced significantly, offering improved accuracy for modern Ram 1500, 2500, and 3500 trucks. These driving aids aren't just a luxury - they are essential safety tools that prevent low-speed collisions and costly repairs. Common Dashboard Warnings & Issues With Ram ParkSense Like any electronic system, park assist sensors can experience glitches or register false readings. The most frequent issues Ram truck owners encounter include: "Service ParkSense System" warning message on the instrument cluster. "ParkSense Unavailable Wipe Rear Sensors" error. Continuous, false warning beeps with no visible obstacles nearby. Sensors failing to detect vehicles, curbs, or objects in reverse. The ParkSense switch indicator light staying permanently disabled. Quick Diagnostic: The Fingertip "Click" Test Before attempting a system reset, perform this simple diagnostic test to determine whether you have a simple software glitch or a dead sensor that requires physical replacement: Set your truck's ignition to the RUN position with the engine turned OFF. Engage the parking brake fully for safety and shift the transmission into REVERSE. Walk to the rear or front bumper and gently place your fingertip against the face of each individual sensor cap. A working ultrasonic sensor will produce a faint, rapid clicking vibration against your finger. If a sensor is completely silent and still, it is likely damaged, unplugged, or burnt out. A software reset will not fix a physically dead sensor, and it will need to be replaced. Preparing To Reset Your Ram Park Assist Sensors Before starting the reset process, observe the following safety and preparation steps: Park your Ram on a flat, open surface away from surrounding obstacles. For Methods 1 & 2 (Dashboard and Uconnect resets), ensure the vehicle is in PARK and the ignition is in the RUN position. For Method 3 (Battery disconnect reset), ensure the engine is completely OFF, the ignition is turned off, and the key fob is removed from the vehicle. Inspect the front and rear bumper sensors to make sure they are clean and free of heavy dirt or mud. Step-By-Step Guide to Resetting Ram Park Assist Sensors Method 1: Cycling the Rear ParkSense Button This soft reset reboots the ParkSense module directly from the physical control panel: Locate the rear ParkSense button on your center console switch bank. Press the button to toggle the system OFF and ON again. Repeat this process 10 consecutive times. On the 10th cycle, leave the system turned ON. Shift into Reverse (with your foot firmly on the brake) to test if the warnings clear. Method 2: Soft Reset via the Uconnect System You can cycle the system power through your infotainment center: Access the Settings menu on your Uconnect touchscreen display. Navigate to Safety & Driving Assistance. Locate the ParkSense settings and toggle the system to OFF. Turn off the vehicle ignition, exit the truck, and wait approximately 2 minutes for the vehicle's electronic modules to enter sleep mode. Restart the truck, navigate back to the Uconnect menu, turn ParkSense back ON, and test the sensors. Method 3: Battery Disconnect (Hard Reset) If software resets fail, a hard reboot of your truck's electronic control units (ECU) may clear persistent memory codes. Safety Warning: Never disconnect battery terminals while the engine is running, as this can severely damage your alternator and electrical system. Ensure the ignition is off before opening the hood. Turn off your vehicle completely and remove the key fob from the cab. Pop the hood and locate the main 12V battery. Using a wrench, disconnect the negative (-) battery terminal. Wait 15 to 20 minutes to completely drain residual capacitance in the control modules. Reconnect the negative terminal and tighten the clamp securely. Start your truck and check if the dashboard alert has cleared. Note: Disconnecting the battery may clear saved clock settings, radio presets, and transmission adaptive learning memory. Advanced Ram DIYers can also use specialized OBD2 tools (such as AlfaOBD or JScan) to read and clear specific Parking Distance Control (PDC) diagnostic codes. Winter Weather & Road Salt Impact For drivers in New York, road salt, snow, slush, and ice are the primary triggers for the "ParkSense Unavailable Wipe Rear Sensors" alert during winter months. Frozen grime forms a dense layer over the sensor cap that completely blocks the ultrasonic sound waves. Clear Ice Gently: Use warm water and a soft microfiber towel to melt ice off the bumper. Avoid Ice Scrapers: Never use a plastic ice scraper directly on the round sensor caps, as scraping can scratch the sensor face or damage the silicone sealing ring. Rinse Road Salt: Wash your bumper and undercarriage regularly in winter to stop salt build-up from corroding the rear wiring harness connectors. When Resetting Doesn't Solve the Problem If performing the click test or resetting your system does not clear the warning light, an underlying physical defect may be present: A blown ParkSense circuit fuse in the main power distribution center. Corroded or loose wiring harness pins behind the rear bumper (common on trucks that tow trailers frequently). Physical damage to a sensor lens caused by highway stone impacts or minor bumper nudges. A failed ParkSense central module requiring OEM programming. In these situations, schedule an inspection with a certified Ram repair provider, such as our Bill Volz Westchester service center in Cortlandt Manor. Our technicians utilize specialized Mopar diagnostic equipment to pinpoint exact sensor failures without guesswork. Maintaining Your Ram Park Assist Sensors Clean your sensor caps regularly with mild car wash soap and water, especially after off-roading or driving through mud. Avoid spraying high-pressure washer nozzles directly at the sensor rings from closer than 12 inches. Ensure aftermarket accessories, such as drop hitches, license plate frames, or bumper guards, do not extend into the field of view of the center sensors. Get Professional Help at Bill Volz Westchester Don't let disabled safety features compromise your peace of mind or convenience. If you are experiencing persistent "Service ParkSense" alerts, schedule a service appointment at Bill Volz Westchester in Cortlandt, NY. Our factory-certified technicians will quickly diagnose, repair, or replace your sensors to get your Ram truck back in peak operating condition. Contact our service team today! Image Credit: Front of a Pick-up Truck by Shane West is licensed with Pexels License

Jeep Tire Alignment Check

When to Tell if You Need a Tire Rotation?

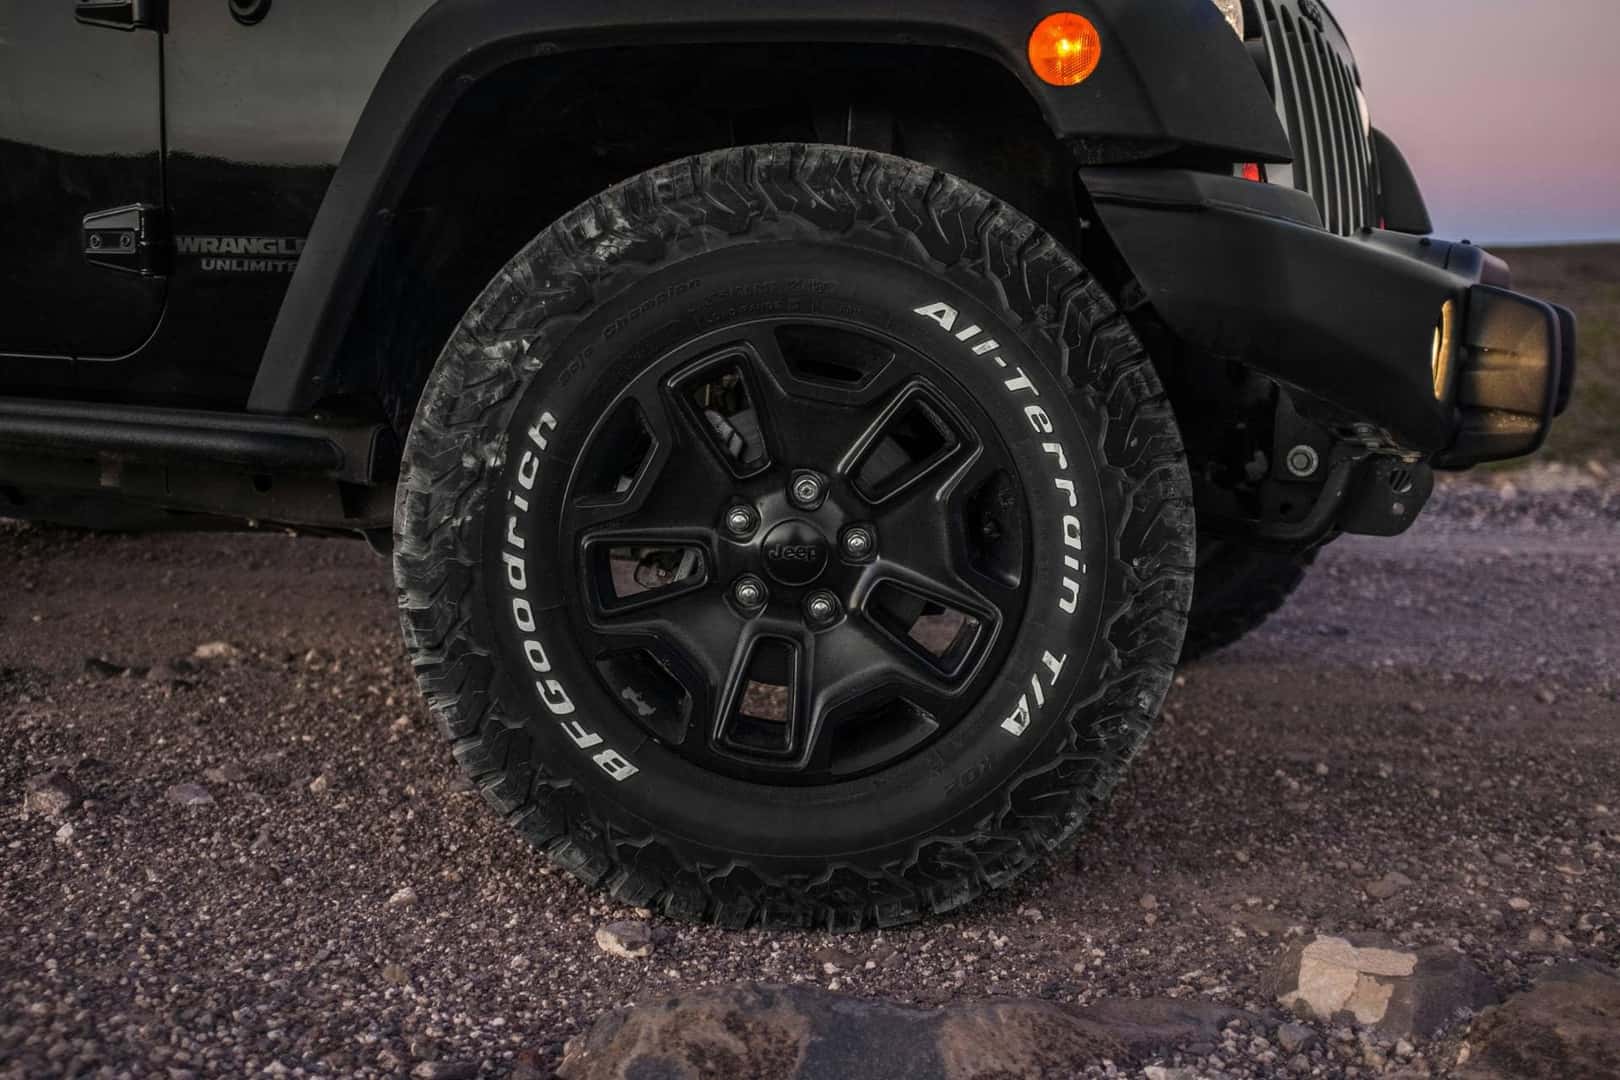
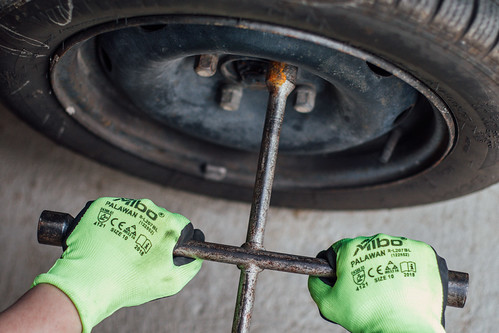
As your car's only contact with the road surface, tires are crucial for its handling and safety. That's why regular tire maintenance is important for your, your passengers', and other road users' safety. Part of your tire care routine is tire rotation, which involves moving each wheel to a different position on the car. If you doubt the need for tire maintenance, just imagine a car having a blowout at high speed on a busy freeway. The consequences can be devastating. We can handle all your tire care needs at Bill Volz Westchester in Cortlandt, New York. But how do you know when you need a tire rotation? Schedule Service Tire Rotations About Us Understanding Tire Rotation Your car's tires provide grip on the road for safe cornering and efficient stopping. On wet roads, they help disperse water to maintain traction. Each tire experiences different stresses depending on its position on the car. On most cars, the front tires work hardest, carrying the engine's weight, steering the car, and handling the braking forces. In front-wheel-drive vehicles, they also pull the car. With rear-wheel drive, the rear tires propel the vehicle. You might think that all-wheel-drive vehicles would have more even tire wear, but that's not the case — power distribution between wheels depends on which wheel needs it. However, in most cases, the front tires tend to wear more quickly than the rear ones. Tire rotation involves swapping the front and rear tires in a specific pattern so that they wear evenly. Regular rotation will help maintain the tires' performance and extend their life, keeping you safer and saving you money. Tire Rotation Patterns Correct tire rotation depends on whether your vehicle has front-wheel, rear-wheel, all-wheel, or four-wheel drive. At Bill Volz Westchester, our technicians will ensure your vehicle's correct rotation pattern. If you plan to rotate the tires yourself, know the recommended pattern before you start. Signs You Need a Tire Rotation Your vehicle owner's manual will specify how often to rotate the tires, or you can ask our Bill Volz Westchester service department experts. However, even if you don't think it's due, you can look out for signs that you need a tire rotation. Uneven Tire Wear If you notice more wear on your front tires than the rear or more wear on one side of an axle, it's time for a tire rotation. If an individual tire has uneven wear across the tread, it's more likely due to wheel misalignment or an unbalanced wheel. Our tire experts can check it out for you. Vibration at Higher Speeds If you feel the car vibrating at speeds over 45 mph, it may need a tire rotation. The front wheels probably need balancing if the vibration is just at the front or from the steering wheel. Mileage Indicator We recommend a tire rotation every 5,000-8,000 miles, when you schedule an oil change, or every six months. However, you may need to do it more often if you're a heavy-footed driver or frequently drive in harsh conditions. Spinning the wheels when pulling away and lots of heavy braking will speed up tire wear, so you'll require more frequent tire rotations. Visual Inspection and Tire Pressure You should regularly check the pressure of all your tires because the incorrect pressure can be dangerous. At the same time, you can inspect your tires for potential problems, such as imperfections, cuts, and bulges, as well as uneven tire wear that could indicate a rotation is necessary. The Impact of Neglecting Tire Rotation Neglecting tire rotation can affect the safety of your vehicle and cost you money. Unevenly worn tires can lead to poor handling and less efficient braking, potentially causing you to have an accident. Your car will experience increased wear and tear to other related components, not just the tires. The vehicle will also be less fuel-efficient, meaning more stops at the gas station. DIY vs. Professional Service You can carry out a tire rotation, but you'll need some special equipment. To move tires, you'll need to raise the whole car and support it on jack stands, which can be dangerous and time-consuming. If a jack stand fails while the wheels are off, your car could sustain serious and expensive damage. Our professional service center has state-of-the-art equipment to carry out tire rotations, including vehicle lifts and air-powered wrenches for a speedy service. Maintaining Your Tires Post-Rotation After a tire rotation, it's important to carry out routine checks to ensure your tires perform at their best and spot any potential problems. At least once a month, check your tire pressures. Underinflated or overinflated tires cause less tread to be in contact with the road, so they'll wear out unevenly and prematurely. You can find the correct pressures for your vehicle in the owner's manual and on the driver-side door pillar. While checking the tire pressures, inspect them for any damage. Look for cuts, tears, or bulges on the side walls or the treads. Any of these could cause a blowout. Check the tread for uneven wear that could indicate your car needs wheel balancing, alignment, or tire rotation. These simple routine procedures will help keep you safe on the road, and you can be confident your tires are in tip-top condition. Schedule a Tire Rotation at Bill Volz Westchester You should make tire maintenance a regular part of your vehicle care routine. Tire rotations are an important part of this routine to ensure vehicle safety and performance. Haven't had a tire rotation recently? Contact us today at Bill Volz Westchester in Cortlandt to schedule a tire service. Our friendly service team will be happy to advise you on all aspects of tire care.

Is your engine leaking oil?

Why is My Car Leaking Oil?

At Bill Volz Westchester in Cortlandt, New York, we understand the concern and frustration vehicle owners experience when they discover an oil leak. Many things can cause oil leaks, and it's impossible to tell how significant the problem is without an inspection. Some leaks are easily fixed and inexpensive, while others can be complicated and expensive. We want you to understand the different causes, how to identify oil leak sources, the necessary repairs to fix an oil leak, and the risks of ignoring it. If you consider yourself handy with a wrench, we'll provide some helpful tips and caution for DIY people. Common Causes of Oil Leaks Your engine's oil works in a sealed environment, primarily in the engine. Various circumstances lead to oil leaks in cars, but they don't all happen within the engine. Instead, they typically start where the oil moves in and out of the engine. A Loose Drain Plug Your oil drains from a simple hole with a bolt plug from the bottom of a pan. The natural vibrations from driving have been known to cause this bolt to loosen. Sometimes, the mechanic fails to tighten this bolt enough. In either case, it's a simple fix to tighten the bolt. A Loose or Faulty Oil Filter You have to change your car's oil filter when you change the oil. This also screws onto your engine and can come loose over time. It doesn't happen often, but sometimes the filter fails due to inferior construction or materials. We see this with aftermarket parts, so we always recommend using genuine original equipment manufacturer replacement parts for all services and repairs. Failing Oil Pan Gasket Gaskets play a crucial role in sealing parts to your engine. Unfortunately, these gaskets fail over time, and there's no routine maintenance you can do to prolong a gasket's life. Replacing this gasket is relatively straightforward, depending on the make and model. Some cars have other parts near or attached that might need to be removed to reach and repair the oil pan gasket. Failing Oil Pump or Oil Pump Gasket The oil pump attaches to the engine and pumps oil through the system. Like most automotive parts, the oil pump doesn't last forever. If it starts to fail, it could leak oil. In addition, a gasket seals it to the engine, which can also fail. Replacing either part can be costly, as other parts must be disconnected to reach and remove the oil pump. Failing Valve Cover Gasket Again, gaskets fail. In this case, you must remove the valve cover and replace the gasket. The cost of this repair varies depending on the model. For instance, a V-8 or V-6 engine has two valve covers, whereas an inline four or six-cylinder has one. In addition, a mechanic must remove other parts to replace the gasket. Damaged Oil Pan We don't find a damaged oil pan responsible for leaks, but it happens. If you recently hit a curb or ran over an object, these can strike the oil pan and create a leak. The leak could be minor or significant, but you'll need a new oil pan. Identifying the Source of the Leak You'll need to look over your engine to find the source of the leak. Start by comparing the oil on the ground beneath your car to related components on the engine. If the leak pools beneath the oil pan, inspect the oil pan. Signs will include wet oil around the edges of the oil pan gasket or plug. Check for fresh oil around the filter seal if the pooling oil occurs beneath the oil filter. In either case, you should check and tighten the plug and gasket. If you notice a looseness, you might have just fixed the problem. The Risks of Ignoring an Oil Leak You always want to pay attention to any leaking fluid, especially your engine oil. Your engine relies on the oil to lubricate and protect its many internal moving parts from friction and the high heat of combustion. Leaking oil leads to less protection and can cause severe and even permanent damage to your engine. It costs thousands of dollars to replace an engine, but you'll spend much less to replace any parts responsible for the leak. DIY Fixes vs. Professional Repair We love DIY people because they share our passion for all things automotive. If you feel you know to inspect and repair an oil leak, we respect that and will help you if needed. You can order parts from us and even speak with a technician if you encounter a challenging problem. However, we understand many owners have neither the time nor the inclination to fix an oil leak. If this sounds like you, we can inspect your engine for oil leaks and make any necessary repairs. Feel free to drop by our service center anytime. We can typically perform this service in under an hour, or you can schedule service online for a convenient day and time. Preventive Measures We admit that parts eventually wear out over time, which leads to oil leaks. You can take precautions to prolong your engine's life and stave off oil leaks. First, we recommend you perform all your regularly scheduled maintenance. Regular maintenance will help avoid early leaks and keep your car running at its peak. Other considerations include using the factory-recommended oil. Using off-brands and the wrong oil type can harm your engine, oil pump, and gaskets, harming these parts and leading to early failure. How you drive also affects your car and its many moving parts. We suggest avoiding excessive engine revving and accelerating hard all the time. These actions put undue stress on your engine and other components. Inspect Your Vehicle for Oil Leaks Today If you know or suspect you have an oil lead, we're here to help at Bill Volz Westchester in Cortlandt, New York. We invite you to schedule an inspection online and let our certified technicians have a look. If they spot a problem, they'll explain everything, including the cost and time to repair it. Photo Credit: Engine oil filler cap by Brian Snelson is licensed with CC BY 2.0 DEED

How to Reset Oil Change Light

Most vehicles have various lights and indicators on the dash to help you understand what's happening with your car. If some of them light up, such as the check engine light, it can be alarming, as it signals a problem. Others, such as the oil change light, are simply reminders that it's time to have your car or truck serviced. An essential part of vehicle ownership is knowing why the oil change light comes on, what to do about it, and how to turn it off again. Service Specials Service Center New Vehicles Why Does the Oil Change Light Come On? The oil change light will illuminate your car's dash when it senses it's time for an oil change. Usually, a vehicle will illuminate the oil change light when you've driven a certain number of miles since your last oil change. This is convenient for drivers because you don't have to keep track of your mileage, such as when you last changed the oil or at what mileage you should change it again. You don't want to ignore this signal. Your car tells you it needs new oil to keep running smoothly. Over time, the oil in your car gets dirty. This is a normal process of the oil working in the engine, but you need to replace the oil regularly to keep it doing its job properly. If it becomes too dirty, it causes unnecessary wear on your engine, leading to many problems. What Should I Do About It? When you see the oil change light come on, make an appointment to have it changed. You can also change it yourself at home if you'd rather. Ensure you're prepared with the right equipment and know the correct steps before you begin. It's best to change the oil as soon as possible once the oil change light comes on. The standard rule was that the oil in a vehicle needed to be changed once every three months or every 3,000 miles. More recently, changes in the way automobiles and oil are made mean you can now go longer between oil changes. Consult your owner's manual to find out exactly how long you can wait, but the oil change light in your car should be set to that interval and come on automatically when it's time for your vehicle to be serviced. How Soon Do I Need To Have My Oil Changed? Once you see the change oil light illuminated on your dash, make an appointment to change the oil. You still have about 500 miles before encountering problems, but that's only about two weeks of driving, or possibly even less if you drive a significant amount. You don't want to damage your car or truck by ignoring the signs that it needs an oil change. In the long run, waiting will cost you considerably more than going in for an oil change as soon as possible. So, don't delay. Make the appointment as soon as you see the light so you know you'll be able to get your car serviced before the old oil causes any damage. How Do I Reset the Oil Change Light? It's important to know that the oil change light doesn't automatically reset once you've had the oil changed. You'll have to do this manually; the sooner you do it after the oil changes, the better. This resets the sensor so your vehicle knows when it's time to change the oil again. If you delay resetting it, you could be driving around with old dirty oil before you even know it's time for a change. How you reset the check oil light depends on the make and model of your car or truck. Below, we outline the basic steps to reset the light for some more common vehicle types. If you can't find your particular vehicle here, the steps to reset the light can be found in your owners manual. GMC and Chevrolet Vehicles With a Vehicle Information Center (VIC) Turn on your car's power by turning the key in the ignition twice or pushing the start/stop button twice. The dash lights should come on, but the engine will remain off. Press the menu button until you see "remaining oil life." Press "set/clr" and then "yes" to reset the oil change light. Honda With a VIC Turn on the car's power but not the ignition. Use your center display to press “settings,” then “vehicle,” then “maintenance options.” Find “reset items,” “engine oil,” and then press “reset.” Ford or Jeep With a VIC Turn on your car's power but not the engine. Do this by turning the key in the ignition twice or pressing the start/stop button twice. Use the buttons on the wheel to find “settings” on your dashboard then “vehicle.” Find “oil life” and then press and hold “OK.” GMC, Chevrolet, Dodge, or Jeep (no VIC) Turn on the car's power without starting the engine. Press the gas pedal down three times, briefly pausing between each press. Turn the car off then back on again. Honda (no VIC) Turn the vehicle's power on but don't start the engine. Press the trip button until you see “oil life” on the dash. Press and hold the trip button until “oil life” starts to blink. Release the button, and then press it again until you see “oil life” stop blinking and reset to 100%. Ford (no VIC) Turn on power to your vehicle without starting the engine. Press on the gas and brake pedals at the same time. Keep holding down the pedals until you see “reset complete” on the dash. Toyota Turn the power on to your vehicle but don't start the engine. Press the trip button on the dash until you see “trip A.” Turn the car off, hold down the trip button, then turn the power back on. Keep holding the trip button until the “resetting maintenance data” message disappears. Where Can I Go if I Need Help? Regular maintenance is essential if you want your vehicle to run smoothly. Don't skip out on this important part of keeping your car in top shape. If you need an oil change or help resetting your oil change light after your car or truck has been serviced, call our service department. Our knowledgeable and friendly staff are always happy to help. Photo Credit: man refilling motor oil on car engine bay by Tim Mossholder is licensed with Unsplash License

Tire Rotation

How often should you get your tires rotated?

When was the last time you rotated your tires? You have come to the right place if you're not even sure about the common auto maintenance process. Learn what it means to get your tires rotated and why it's important with our guide. What Is a Tire Rotation? With a tire rotation, your service technician changes the position of your tires. This service is essential because you want to ensure the rubber tread wears evenly. Front-wheel drive adds wear to that set of tires during accelerating, turning, and braking maneuvers, eroding the material more quickly than the back set and vice versa with rear-wheel-drive models. Other reasons your tires may wear unevenly include the following: Improper alignment. Overinflation. Underinflation. Damaged suspension. Swapping your vehicle's front tires with those on the back is the most common tire rotation method. Your mechanic may switch your tires from left to right, depending on your model. Your owner's manual will specify the best tire rotation pattern for your specific automobile. This guide includes its recommended maintenance schedule every six months or between 5,000 to 7,500 miles. Why are Tire Rotations Important?? Tire rotations should be a part of your car's regular maintenance program, just like oil changes. This service offers drivers genuine benefits you'll notice as soon as you take the wheel. Here are a few of the top reasons to be mindful of your tire rotation schedule: You Can Save Money Rotation spreads wear evenly among all four tires, so swapping them will make your tread last longer, thus saving you money. A new set of rubber will set you back about $600 on average, although replacement costs vary widely by size and type of tire. For example, most sedans or compact crossovers use smaller, less expensive tires than a full-size pickup truck. You could also see savings at the pump. Uneven tread wear increases the rolling resistance on your tires, reducing your car's fuel efficiency. Your Car Will Grip Better Driving wears down tire treads, and how they wear impacts your vehicle's performance. A uniform tread is also better equipped to grip New York's slippery winter roads and uneven terrain. An even tread is also crucial for a smooth transition from a complete stop and to assist your brakes in bringing the vehicle to a safe stop as quickly as possible. You Get Improved Handling Your tire's tread directly affects your car's handling. Uneven wear can hinder your ability to steer your vehicle, either when taking tight cornering maneuvers or in the presence of a road hazard, like a fallen limb or animal in the way. An uneven tread can cause you to lose control of your automobile in an emergency, potentially causing an accident. You'll Notice Less Vibration Because tires inevitably wear at different rates, your vehicle's ride quality will eventually suffer if you don't rotate your tires. Vibrations come from your uneven tread as it impacts the pavement, significantly reducing the smoothness and comfort of your ride. If you delay servicing your automobile, you may feel your steering wheel rattle or your pedals start to jitter, indicating an increasing instability in your suspension system. Even your car's alignment will be eventually affected, and you may notice your vehicle pulling in one direction. Getting your tires rotated improves the lifespan of related components like the suspension system, breaks, wheel bearings, and axles. It Prevents Tread Cupping Tread cupping is when your tires show an erratic wear pattern where a little scoop of the tread wears around the tire every three to four inches. Because of the worn spot's shape, some tire technicians call it "scalloped tires." Tread "cups" can cause your vehicle several issues, depending on the severity, from reduced traction to noise and vibration. If left unattended, the problem could even cause your vehicle to bounce, making it unsafe to drive. Of course, regularly scheduled tire rotations will prevent this issue. You Have a Lower Chance of a Blowout As you drive, your tires get thinner and thinner. The more its tread wears away, the higher the chance you'll experience a blowout, especially when traveling at high speeds due to the build-up of heat in the rubber. Potholes, curbs, and other objects increase the risk of damage to your vehicle. If you're concerned about blowouts, rotating tires can help them last longer, and even if you opted for a road hazard replacement warranty, many providers require scheduled tire rotations to validate their coverage. Your Tires Get a Routine Inspection Having your tires rotated gives a service technician a chance to thoroughly inspect your tires. They'll measure your tread depth and check for damage, cracks, cuts, and bulges, plus punctures from items like nails, glass, and rocks that could cause a slow leak. If your mechanic finds anything suspicious, he'll have the resources to repair or replace the tire promptly. What to Do If Your Tires Need Rotating If it's been a while since you had your tires rotated, make an appointment as soon as possible. Having the service done to your vehicle is easy, and there are many options near Cortlandt where you can get it done. The process usually takes 30 to 45 minutes at a qualified dealership, so you could schedule it during your lunch hour. Every tire store has its own shop rates. However, the average cost of a tire rotation in New York is between $24 to $50, but it can be as much as $120. No matter where you schedule your tire rotation service, make sure it's with a trusted service center, like the one you'll find at Bill Volz Westchester on 2293 Crompond Road. A lot is riding on your tires, and the last thing you need is a preventable problem that causes a costly repair. If you don't remember the last time you rotated your tires, it's time to get it done. Let us know if you have any questions about vehicle maintenance, or better yet, come to our dealership and get to know our friendly and knowledgeable service staff.

Oil change service Cortlandt, NY

How Often Should You Get An Oil Change?

Most drivers know that it's important to get their oil changed, but not everyone understands why. Here at Bill Volz Westchester in Cortlandt, New York, we love to help our customers understand their cars and how to take care of them, so we've put together an explanation of why regular oil changes are important. We'll also go over how often you should change your oil, the benefits of doing so, and how to change your oil. Should You Go By Oil Life or Mileage? Experts recommend changing your oil after about 3,000 to 7,000 miles of driving. The exact instructions may differ depending on your vehicle's make and model. If you'd like to check your vehicle's recommended oil change schedule, you can look it up in your owner's manual or contact us at Bill Volz Westchester. If you're not sure how long ago you last changed your oil, you can check for signs that it's time for an oil change. These include illumination of the oil warning light, the car's check engine light, or an abnormal oil level. Other factors influencing how often you should change the oil in your vehicle include the type of road you often drive on and the weather conditions you experience. You can follow the standard recommendations in your user manual if you often drive in the city under normal driving conditions. If you often drive off-road, tow heavy trailers, or often drive in challenging weather, you might consider changing your oil more often than the manual suggests. Why Change Your Oil? Motor oil keeps your car running smoothly because it lubricates the engine as you drive. Over time, oil breaks down, thickens, and gets dirty. This makes it a less effective engine lubricant and may cause your engine to overheat. Changing it is a great way to keep the engine cool, healthy, and safe. Specifically, it may help preserve the integrity of moving engine parts, including the pistons and valves, because proper lubrication can prevent them from rubbing together and creating excess friction. What are the Benefits of Changing Your Oil Regularly? In addition to engine lubrication, here are a few specific advantages to following a regular oil change schedule: Improved Gas Mileage Gas mileage is the rate at which you travel as compared to the number of gallons of gas it takes to travel that distance. Fuel-efficient vehicles are more likely to have better gas mileage, meaning you can travel farther with fewer gallons of gas. Cars with regular oil changes can also achieve better gas mileage. This means that you can save gas and money by changing your oil regularly. If you drive long distances regularly, this might be useful. Cleaner Engine Changing the oil in your car is a great way to remove any dirt or grime that may have built up. With each oil change, it is also a good idea to replace your oil filter. Once you have removed this debris, your engine can run more smoothly than before. You can check how clean or dirty your oil is by observing the color. Clean oil is usually an amber color, so if your oil is dark or thick, making it difficult to see through, it may be time to change your oil. Increased Engine Life The improved gas mileage and engine lubrication that changing your oil consistently can accomplish may help prolong the life of your engine. This is because when the engine is running smoothly, it decreases the strain on each part of the engine. If you plan to keep your car for a long time, routine oil changes can help ensure its longevity. If you'd like to sell your vehicle, a record of regular maintenance can increase its value because of the increased engine life with which this maintenance is associated. Continued Warranty Many car manufacturer warranty agreements stipulate the owner must follow the recommended car maintenance schedule to receive full coverage. Changing your oil regularly can help ensure the manufacturer is responsible for reimbursing any engine damage you might encounter under the warranty agreement. This can save you thousands of dollars out of pocket. After all, the price of an oil change is significantly lower than the price of a new engine. How To Change Your Oil You can change your motor oil yourself. This process involves draining the car of all the old oil, replacing the filter, and adding the proper amount of new oil. To do this, you'll need access to your car's fuel drain port. For some vehicles, this may be underneath the car, so you'll need a jack to raise it and gain access. You'll also need a new filter, several rags, a reciprocal for oil collection, and new oil to put in once you've drained the old oil. After the oil change, check the oil levels before you hit the road. If you're nervous about changing the oil in your car yourself, why not leave it to the professionals? If you live in the Cortland area, you can schedule an oil change with us at Bill Volz Westchester. Our experienced technicians can change out your lube, oil, and filter to get you back on the road in no time. Schedule a Quick & Easy Oil Change in Cortlandt, NY, Today! Are you ready to change your oil? Here at Bill Volz Westchester, our goal is to help you keep your car running smoothly for the best possible price. Oil changes are one of the wide range of services we offer to help our customers achieve that goal. You can learn more about changing your oil, then schedule your service online today. To schedule over the phone, just give us a call at 914-402-9211. Alternatively, drop by our dealership at 2293 Crompond Road in Cortlandt. You can also keep an eye out for special deals on other car services, like battery testing, climate system cleaning, cooling system services, and tire rotation services. If you want to learn more about why you should change your oil or have questions about how to schedule an oil change, don't hesitate to contact us for more information. Photo Credit: Image used with permission via OEM

Ford Engine

Important Facts About Belts and Hose Maintenance

Inside your engine, there are several belts and hoses that can wear down over time and might need to be replaced. These parts are made of durable, long-lasting plastic and rubber but can deteriorate from heat and pressure. Thankfully, these components are relatively easy and cheap to replace, so keeping an eye on your belts and hoses can prevent damage to your engine's more expensive components. To help you learn more about what the belts and hoses in your engine do, and to provide you with information about how often you should replace them, our staff put together this overview. What Are Engine Belts? Engine belts are strips of rubber that connect different components of your car's engine. Depending on the type of car you drive, your engine might have multiple different belts or a single, long belt known as the serpentine belt. Most modern cars use a single serpentine belt to connect many of your vehicle's important systems like the alternator, engine water pump, power steering pump, and more. The serpentine belt uses the engine's power to operate these systems, so if yours breaks, it can cause damage to many different functions. Older vehicles tend to have multiple different belts, known as V-belts. Unlike serpentine belts that connect multiple different systems, V-belts typically affect only one part. Regardless of what kind of engine your car has, understanding how the different belts work together to keep your vehicle operating is important. If you begin to notice issues with things like power steering, and air conditioning, or if your engine starts to overheat, a faulty belt might be the culprit. What Are Engine Hoses? Just like belts, engine hoses are durable components that are made of rubber or plastic. These hoses transfer important liquids to the different parts of your engine, and are vitally important for the proper functioning of your vehicle. Some of the most commonly known hoses are radiator hoses, which carry coolant to and from your engine. These are built to withstand the extreme heat and pressure that comes from transferring hot material out of your engine block, but over time, they can degrade. If your car is experiencing problems in hot weather, or if your check engine light comes on, it could be an indication that your radiator hoses are not properly distributing the heat in your engine. Some other examples of hoses are heater hoses, which transfer coolant to and from the heater core. If the heat in your car isn't working, it could be related to a problem with one of these hoses. The hydraulic braking and power steering systems in your car also rely on a system of hoses, so problems with these features could result from hose deterioration. Why Is It Important To Maintain Your Belts and Hoses? Even though the belts and hoses in your engine are built of highly durable material, they can still degrade faster than some of the metal components. When these rubber pieces break down or stop functioning correctly, it can damage the other parts of the engine that might be more costly to repair. Performing frequent maintenance on your engine's belts and hoses can prevent damage to your engine that could end up costing you thousands, so it's crucial for you to have your car inspected every couple of months. When Should You Replace Your Belts and Hoses? Understanding when to replace these rubber parts is an important part of owning a car. One of the best practices to ensure that your engine is in top condition is to simply follow the manufacturer's recommendation. Most parts manufacturers will issue instructions that recommend you have your parts inspected every 50,000 to 60,000 miles, or after a certain number of months. Even if you don't notice any issues with your car's performance, we urge you to follow these instructions and have your car inspected when the time comes. If it isn't time for an inspection but you're still noticing issues with your engine's performance, it could be a good idea to pop the hood and take a look yourself. Depending on the type of car you have, you might be able to visually inspect the belts and hoses. When looking at your engine's belt, keep an eye out for cracking, blistering, or tearing in the material. If you notice any of these signs or frayed fibers on your belt, it could be a sign that it's time for a replacement. When examining your engine's hoses, you should look for similar signs of wear on the rubber. If you can reach these hoses, you can see how they feel when squeezed. A proper engine hose should feel sturdy and slightly pliable. If your hose is mushy or brittle, it's possible that it's begun to break down due to the changes in temperature that it's subjected to. You should also keep an eye out for bulges in the rubber that could result from exposure to high pressure. How To Replace Your Belts and Hoses Once you've found a problematic belt or hose, you should immediately replace it before your engine gets damaged. Since these components are crucial to the proper functioning of your engine, we highly recommend that you take your car to a certified professional rather than trying to install it on your own. Our service department can inspect your car to identify any belts or hoses that should be replaced and then perform the replacement quickly and easily. Trying to replace these components without the proper tools could lead to more damage, so before you do anything, please consult a professional. This was a brief overview of the importance of properly maintaining the belts and hoses in your engine. If you have any questions about the condition of your engine or want to schedule an inspection with our team, please give us a call. Here at Bill Volz Westchester, we are committed to providing the highest level of care for our customers, so please stop by today.

How To Know if the Compressor Is Going Bad on Your Jeep

Having air conditioning (AC) in your Jeep is a luxury one can't afford to lose, especially in the hot summer months. When your AC is working correctly, you probably take it for granted, but when you begin to notice warm air coming from the vents when the AC is running, you will soon realize that something is wrong. There are several signs or symptoms to note when diagnosing a bad AC compressor. Let's explore how your Jeep's AC compressor works, the symptoms, and what you should look for when you suspect that your AC compressor is going bad. Schedule Service Service Center Call Us Today How Your Jeep's Air Conditioning System Works Air conditioning in cars is a system that allows you to lower the temperature in your vehicle's interior, keeping you and your passengers comfortable as you drive from place to place. Several components work together to achieve AC in your Jeep. These components are: Refrigerant Refrigerant is the fluid used in an AC system responsible for cooling the air circulating as the AC runs. This fluid must have specific characteristics that allow it to phase from a gas to a liquid and back to a gas again. Refrigerant is cycled through the system, continually repeating the process. Compressor The compressor is the powered unit of the AC system that pressurizes and heats the refrigerant (in gas form) received from the evaporator. Then, the compressor sends the pressurized refrigerant to the condenser. Condenser When the refrigerant passes through the condenser, the condenser becomes hot. The heat from the refrigerant and the condenser is transferred to the cool air forced into it by your Jeep's cooling fans and forward motion. At the end of the condenser, the refrigerant passes through an evaporation valve, cooling it to the point of transforming back into a liquid. Evaporator The rapidly cooled refrigerant from the condenser enters the evaporator, where the AC system's blower fan forces warm air over the evaporator. The evaporator is held under low pressure to lower the boiling point. The cooled refrigerant then absorbs the heat from the air passing over the evaporator, begins to boil, evaporates, and returns to a somewhat cool gas. The warmer air that the blower fan has forced over the evaporator enters the cabin of your Jeep as cool air or AC. Diagnosing a bad AC compressor isn't as difficult as it may seem. You can identify symptoms that will give you clues that your AC compressor is failing or has gone bad. Knowing what to look for when your compressor is going bad can help you save time and money, so let's take a look at the most common signs of a bad AC compressor. Higher Cabin Temperatures One of the most telling signs of a bad AC compressor is warm or hot air coming from your Jeep's vents when the AC is on full blast and has been running for a few minutes. If your compressor isn't working correctly or has completely failed, the refrigerant won't circulate through the AC system to cool the air, resulting in hot air blowing out of the vents. This process may be gradual as the compressor slowly dies or sudden, depending on how your compressor goes out. AC Compressor Making Loud Noises Your Jeep's AC system does make some noise when activated, and these normal noises are just a notification that the system is working correctly. But when you turn on your AC and hear unfamiliar noises, this can be a sign that your compressor is beginning to fail. AC compressors rely on a sealed bearing and many internal components. When any of these become worn or damaged, the efficiency of the compressor will be drastically reduced, making it difficult for the compressor to run. These noises are signs of a more serious issue, and you will need to have your compressor checked and replaced. Our service department at Bill Volz Westchester in Cortlandt, New York, can help you diagnose a bad compressor and skillfully remedy the situation, quickly getting you back on the road in the comfort of AC. Fluid Leaks Refrigerant leaks are a significant concern for the environment. The most common type of refrigerant is Freon, and it is proven to harm the atmosphere's ozone layer when allowed to escape and evaporate. These leaks can occur at connection points along the AC lines or through the compressor when the compressor's internal bearings begin to wear or become damaged. An AC compressor will go bad when run without sufficient refrigerant, so leaks need to be addressed immediately when they are detected. A Seized Compressor Clutch AC compressors are run directly from the power of your Jeep's engine via a belt system. To control whether the AC is on or off, the AC compressor operates via an AC compressor clutch. The clutch allows the compressor to disengage when the AC controls are turned off. There are two ways that a compressor clutch can become seized or stuck. First, it can be stuck in the on position so that the compressor continually runs, causing early damage to the AC components due to excessive use. Second, it can be stuck in the off position, not allowing the AC system to work at all. Consult your Jeep's owner's manual for information regarding the location of your compressor clutch, and you can check to see if it is spinning when the AC is on or off. You may be able to have the clutch replaced but you will probably need to replace the entire compressor. Squealing or Skipping Belt When you engage the AC compressor by turning the AC system on, it causes more tension to be placed on your Jeep's drive belt. If the compressor is beginning to go out or has gone bad, it may cause your drive belt to jump, skip, or squeal as the belt won't turn properly with the defective compressor. Other signs of a bad compressor can be in the form of blown fuses or relays. If you feel that your Jeep may be experiencing AC problems, don't hesitate to contact us or visit Bill Volz Westchester for help. Our trained technicians can diagnose and correct all AC-related issues, keeping you cool and comfortable during the summer months in Cortlandt.

Contact Us

Fill out this form below and we'll contact you shortly
*Required Fields